
Introduction
Our website offers a user-friendly platform for creating process diagrams. Whether you’re outlining workflows, procedures, or any process that needs clear visualization, our tool simplifies the process. Below, we’ll guide you through the steps to generate process diagrams effortlessly.
Getting Started
Creating a New Workflow ![]()

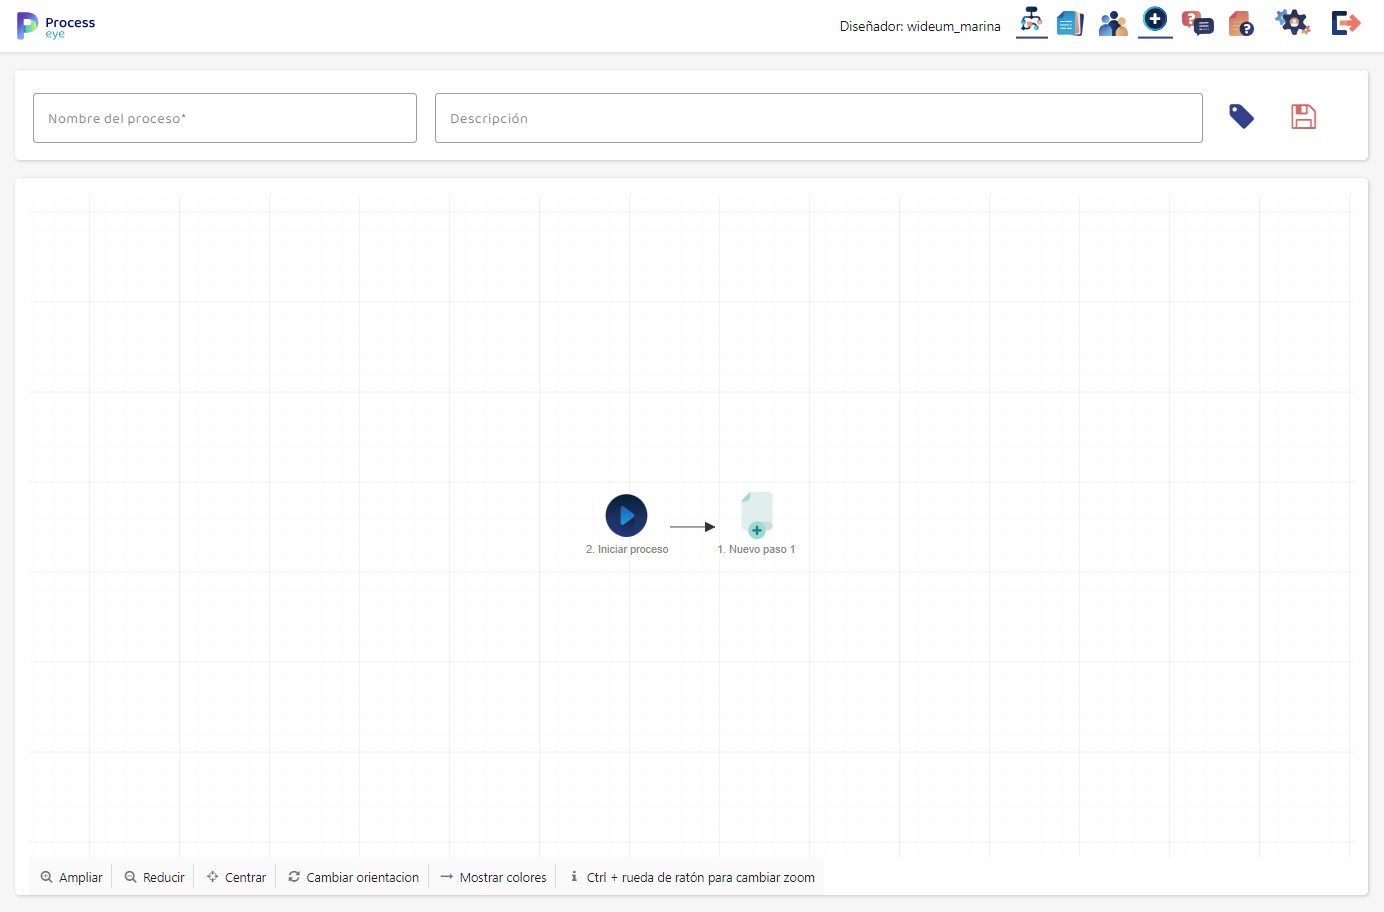
To begin, click on “New “ you’ll be presented with a simple form where you can provide the name of the workflow and a brief description. This information will help you identify your process later.
Adding Your First Step
After defining your workflow , you’ll find an initial diagram with two nodes: the “Start” step and a “New” step. Click on the “New” step to start building your workflow .
Building Process Steps
Selecting Step Type
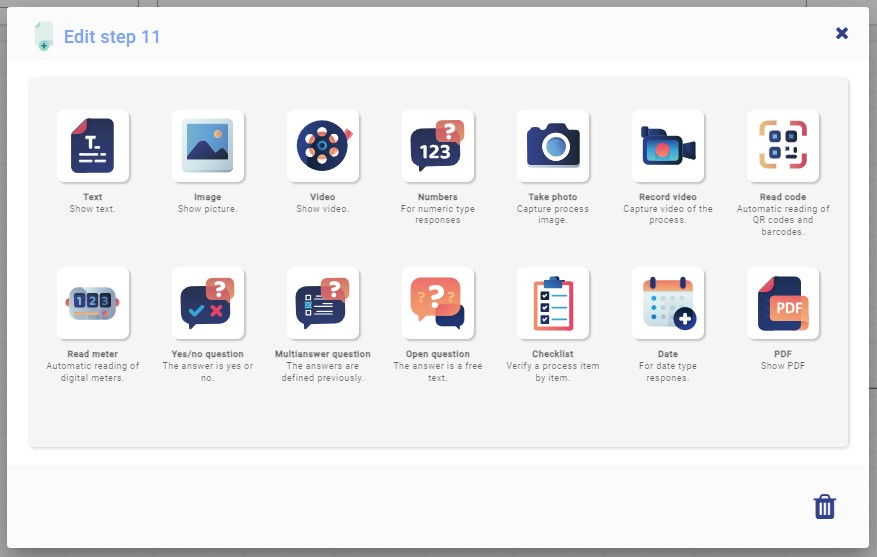
Clicking on the “New” step opens a dialog box that allows you to choose the type of step you want to add. You can select from various options such as an image, PDF, or a question. Depending on your choice, additional fields specific to the step type will appear.
Completing Step Details
Fill in the necessary details for the chosen step type. Ensure all required fields are correctly filled out. The system will not allow you to save the step until all mandatory information is provided. You can consult the “steps” section for more information.
Saving the Step
Once you’ve completed all the required information for the step, you can save it. The system will provide you with several options:
- Save: Save the step and continue working on your workflow .
- Save and Create New Step: Save the current step and immediately begin creating another one.
- Save and Create Previous Step (Only available if it’s the first step): Save the current step and create a previous step.

Saving the workflow
To save your workflow , you must have at least the process name and one fully completed step. The system will not allow you to save if there is an incomplete “New” step with missing data.

Sharing and Permissions
QR Code Access
After successfully saving your workflow , you will have tree new buttons. One allows you to generate a QR code, providing direct access to the workflow from any device, such as mobile phones or smart glasses.
Setting Permissions
The second button opens a dialog where you can configure permissions. You can specify which technicians or groups of technicians can access and view this process. Create custom access configurations as needed.
Information about the company
The “Additional Information” button is used to customize and include company-specific details in the header of reports generated when a workflow is executed. Clicking this button opens a window with a form where you can input information about your company. The data you enter into this form will be reflected in the report’s header, creating a customized header for your company’s documents.
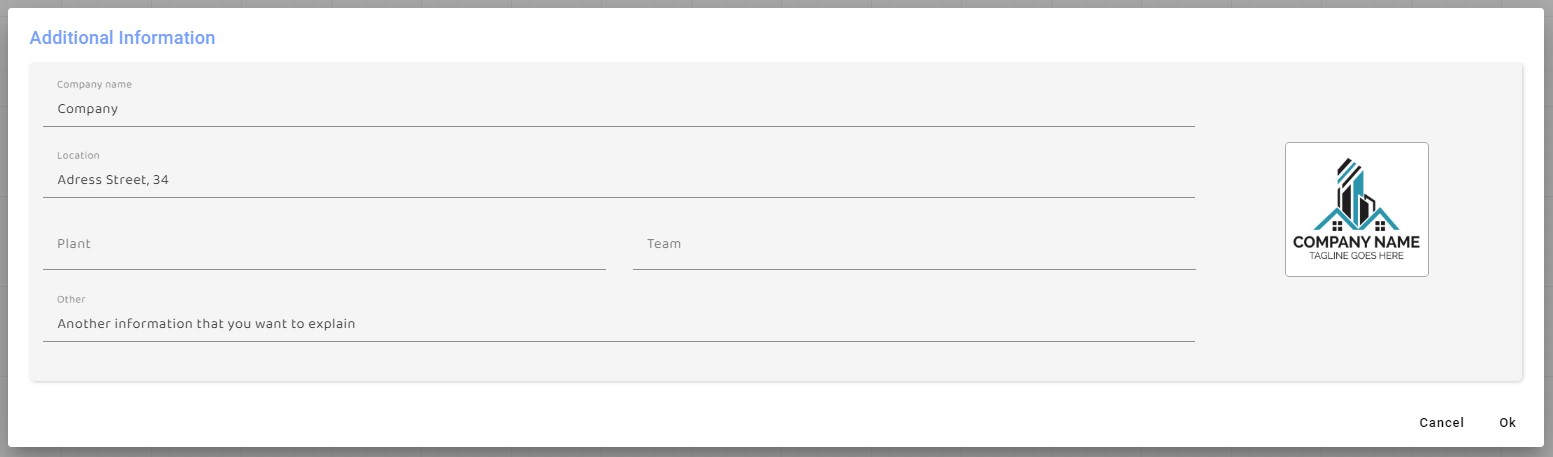
- Company Name: Enter the name of your company.
- Logo: You have the option to upload your company’s logo, which will be displayed in the report header.
- Location: Input the location or address of your company.
- Floor: Specify the floor or level of your company’s physical location.
- Team: Mention the team, department, or group within your company associated with the workflow.
- Other: Use this field for any additional or specific information about your company that you want to appear in the report header.
Customized Report Header: The information you provide in the form will be displayed as a customized header at the beginning of reports generated through the platform. The header will only include the fields from the form that you have filled in. Please note that you will need to complete this form separately for each workflow , as the information is workflow -specific and will appear in the reports for that particular workflow. While the information is currently unique to each workflow , there are plans to allow for reusability in the future. This feature enables you to brand the reports with your company’s identity and contact information, making them more professional and tailored to your organization’s needs.

Additional Functionality in Diagram Visualization
In addition to the core features of creating and saving process diagrams, our website offers several advanced functionalities to enhance your experience and the clarity of your diagrams. Here are the details:
Arrow Color Differentiation
Arrow Color Button: To make it easier to follow different paths within complex diagrams, we provide a button that allows you to change the color of arrows. Each arrow in the diagram can be given a unique color, making it simpler to track and understand the flow of your workflow.
Diagram Orientation
Orientation Toggle Button: Our platform gives you the flexibility to switch between horizontal and vertical diagram orientations. This feature allows you to choose the layout that best suits your workflow, enhancing clarity and presentation.
Zoom Functionality
- Zoom In and Zoom Out Buttons: Zooming in and out of your diagrams is essential for detailed examination or obtaining a broader overview. Our platform offers buttons for zooming in (+) and zooming out (-), allowing you to control the level of detail in your diagram.
- Fit to Screen Button: Clicking this button adjusts the diagram to fit within the current screen size. It’s a handy feature for quickly optimizing the view, especially in the case of large and complex diagrams.
- Control + Mouse Wheel: For fine-tuned zoom control, you can hold down the “Control” key on your keyboard and use the mouse scroll wheel to adjust the zoom level. This allows you to focus on specific sections of your diagram.
These additional features empower you to create and view complex process diagrams with ease and precision, enhancing your overall experience and making it simpler to understand and manage intricate workflows.
Post your comment on this topic.